Holiday Wreath Inspiration! Take a peek at my classic & cute holiday wreath makeover!
I’ve had this wreath for a few years now, and over the last two years have found excitement in reviving it for each new holiday season. If you have an old wreath that you use from year to year, this is a simple, cost-effective way to give it some new life and bring an updated vibe to this season’s holiday decor! It took me just about 30 minutes from disassembling to reassembling all new parts.
A word of affirmation for you: You are valuable, woman, and whatever you put your hands to will succeed!
Watch my how-to video of my holiday wreath transformation here:
Holiday Wreath Transformation Steps:
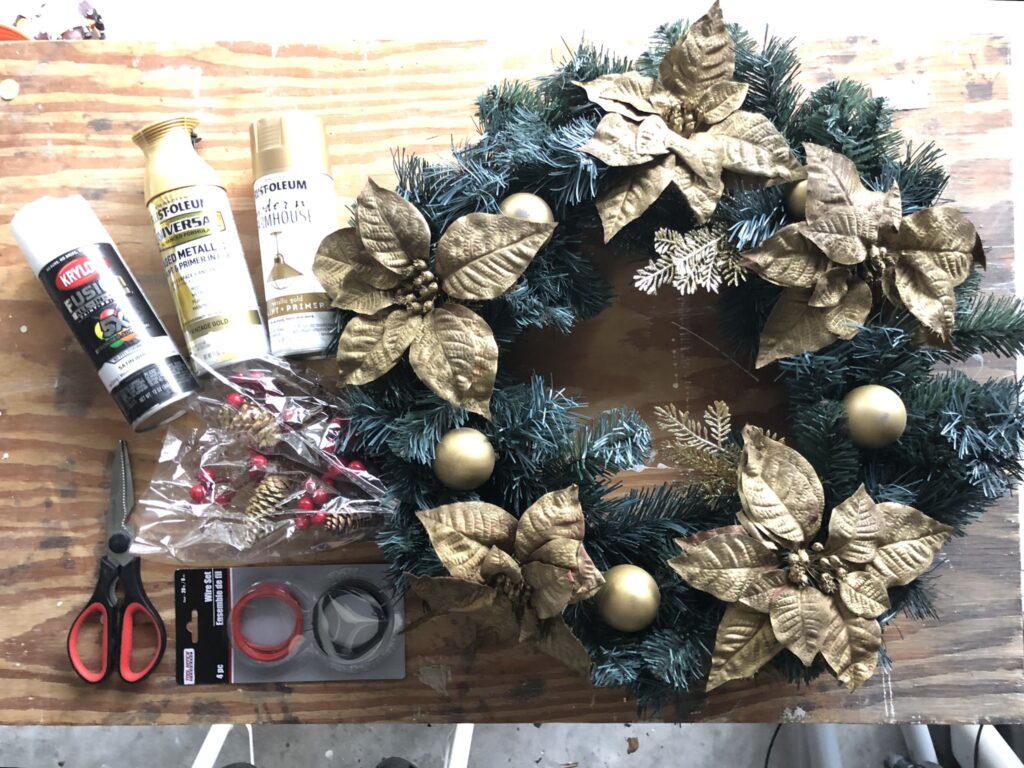
- Start by gathering all of your tools, supplies, and new add-on materials.
- You can have a vision in mind, but get creative and also allow room for adjustments as you go along. You can build a new wreath, or revive your existing wreath with new additions! I purchased my wreath about 4 to 5 years ago from The Home Depot for about $10, and it came with the leaves (previously they were red Poinsettias) and the ornaments (also previously red). I completed a wreath revival for 2021 Christmas as well, transforming the leaves and ornaments into the golden “before” color you see represented here. 🙂
- Disassemble selected parts of your existing wreath. I first disassembled my golden ornaments in order to revive their paint color using Rustoleum’s Aged Metallic Paint & Primer in One Vintage Gold from The Home Depot for around $7.
- If you’ve decided to paint anything, get those items completed first so that they will have time to dry.
- I found a 2-pack of pinecones & berries from Walmart for just $5 and thought it would be a great idea to deconstruct the assembly and add the little berries and pinecones to my revived wreath.
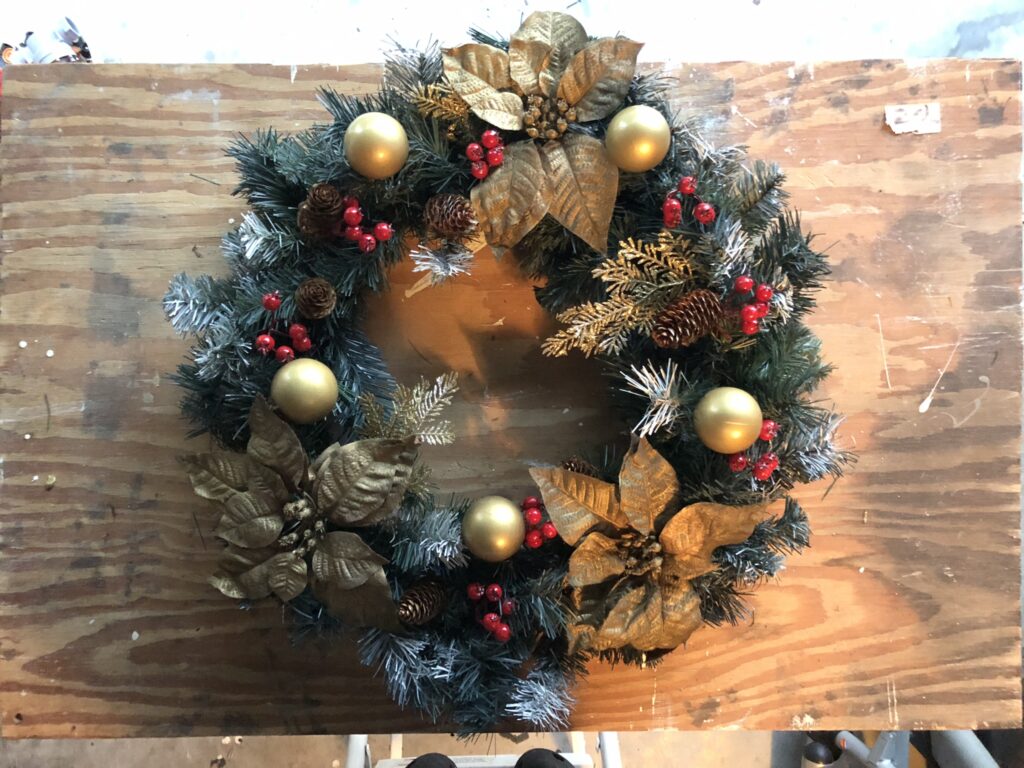
- Begin adding your new additions in alingment with your creative vision. You can also move existing items from one place to another on your wreath in order to give it an elevated look.
- Once your painted items have had time to dry, begin adding them back into the desired places to give your wreath a completed and wholesome look.
- Take it to the next level by adding in “snow!” I’ve used Krylon’s Fusion All-in-One Paint + Primer Satin White. I got it at some point throughout the year for between $5-$7. Just pops of white snow painted in here and there give it an authentic and professional look. I even painted the tip of a pinecone for that real look.
- Once you’ve added your finishing touches, review it and anchor in any tweaks.
- Now, step back and reflect on your handiwork!
Here are a few accolades from Krylon and Rust-Oleum on my Holiday Wreath Transformation:

Shop This Look:
Wreath: From The Home Depot a few years back
Pinecones with Berries: Walmart (deconstructed)
Ornament Color: Rustoleum Aged Metallic Paint & Primer in One Vintage Gold from The Home Depot
Snow Effect: Krylon Fusion All-in-One Paint + Primer Satin White
May you and all those around you be blessed with the bountiful blessing of the Lord in this season and beyond, and may you be filled with His abundant joy, peace, and wellness! Merry Christmas, y’all!
– Kaye Howard –